Services

Choosing a Commercial Drywall Contractor in Indiana

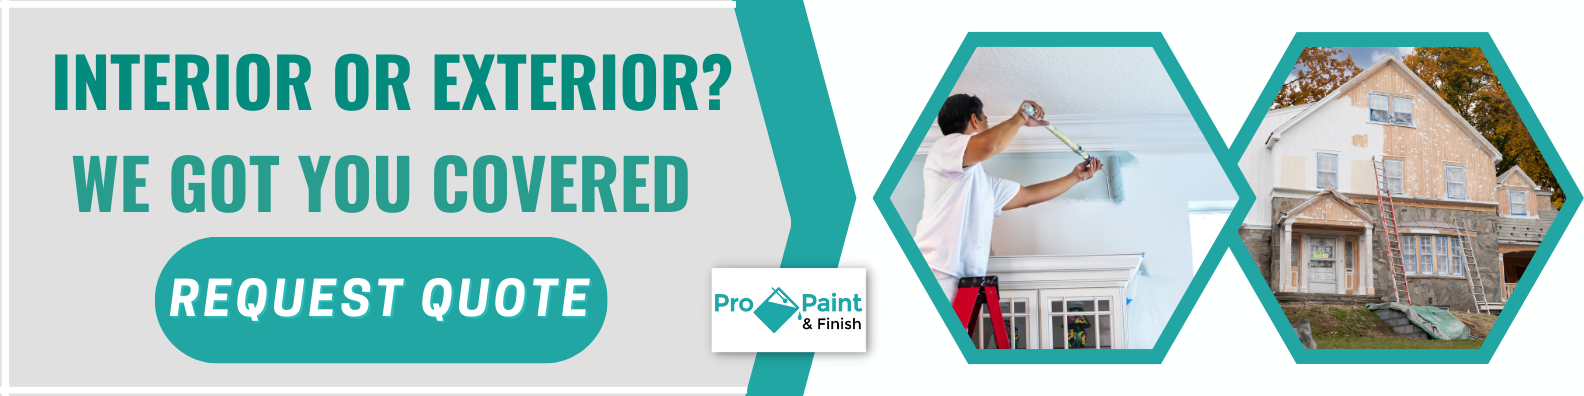
How To Choose A Drywall Contractor

When undertaking a new construction project or remodeling in areas such as Goshen, IN, Granger, IN, South Bend, IN, or Elkhart, IN, selecting a top-tier drywall contractor can't be overstated. Pro Paint & Finish strongly advise ensuring that your chosen contractor has substantial experience and is licensed and insured. In addition, their reputation for quality workmanship, punctuality, and effective communication plays a significant role in the project's successful completion.

Similarly, suppose you're in Mishawaka, IN, Syracuse, IN, Warsaw, IN, Kendallville, IN, or other locations like Plymouth, IN, Nappanee, IN, Shipshewana, IN, or Millersburg, IN. In that case, finding a contractor who offers transparency about their services and pricing and has earned positive reviews and ratings from their previous clients is crucial. Pro Paint & Finish emphasizes the value of this approach in ensuring high-quality, timely, and efficient drywall installation or repair jobs.

Experience and Expertise: Why They Matter

Pro Paint & Finish, based in Goshen, Indiana, offers comprehensive commercial drywall services demonstrating unmatched expertise in drywall repair, installation, replacement, and finishing for diverse commercial properties, including multi-level and multi-unit buildings. With over a decade of industry experience, our certified, bonded, and insured contractors deliver superior quality in their craft, giving you the confidence that your project is in expert hands. In addition, we uphold the highest standards of craftsmanship and customer service. We also offer no-risk assessments, free estimates, and flexible scheduling to suit your needs.

Our professionals at Pro Paint & Finish appreciate your vision for perfection, dedicating ourselves to understanding your unique drywall needs and devising a detailed plan to fulfill them efficiently. As a result, you can trust your commercial property with us, knowing that our meticulous attention to detail aligns with your own.

We provide exceptional services to a wide range of commercial properties, including apartment complexes, office buildings, restaurants, retail stores, strip malls, hospitals, grocery stores, schools, retirement homes, theaters, museums, stadiums, churches, gas stations, and more.

Licensed & Insured in Indiana

At Pro Paint & Finish, we recognize the vital importance of commercial drywall services performed by licensed and insured contractors. Employing such professionals safeguards your property from potential damages and guarantees adherence to all applicable codes and standards.

Engaging a licensed contractor gives you confidence in their qualifications and accountability, mitigating the risks associated with unlicensed and uninsured operators. They ensure the work done on your property is up to par, protecting your assets and preventing non-compliance issues. Moreover, insured contractors shield you from financial liabilities, providing reassurance that your interests are covered in the event of accidents or unforeseen complications. Before hiring, verifying a contractor's licensing and insurance status is crucial, underscoring their professionalism and commitment to their client’s safety and satisfaction.

Transparent Pricing

Transparent pricing is a crucial aspect of our services at Pro Paint & Finish, and we strive to provide a clear and comprehensive breakdown of all costs involved in your commercial drywall project. Here's what you can expect:

  • Material Costs: This includes the cost of all the materials required for the drywall project, such as the drywall panels, screws, tape, joint compound, and any additional items needed.

  • Labor Costs: The labor cost involves the hours put in by our professional team to install, repair, or finish the drywall. This depends on the project's size and complexity.

  • Overhead Costs: These are the expenses related to operating our business, such as insurance, equipment maintenance, and office expenses, that are incorporated into the overall pricing.

  • Additional Services: Costs related to any add-on services you request, such as specialized finishes or complex designs, will be explicitly itemized.

We believe in transparency and will gladly discuss any questions you may have regarding the cost breakdown of your project.

Post-Service Cleanup and Maintenance

For businesses in Indiana seeking commercial drywall services, it's essential to understand the critical importance of post-service cleanup and maintenance, a detail often neglected yet pivotal to your project's longevity and overall success. We at Pro Paint & Finish take this crucial step very seriously.

Post-service cleanup, executed with meticulous attention, is about more than just removing construction debris; it's about ensuring your business premises remain clean, orderly, and ready for immediate operations. We aim to reflect the high-level professionalism you expect and deserve, leaving your workspaces in impeccable condition.

Similarly, regular maintenance is crucial in safeguarding your drywall's enduring integrity and aesthetic appeal. Our experienced team offers expert advice and effective strategies to help you maintain your commercial drywall, thereby extending its lifespan and preserving its looks. In addition, we provide guidance on preventative measures against damage, routine inspections, and cues on when professional repair services might be necessary.

WHAT MAKES SENSE FOR YOUR BUSINESS?

In conclusion, Pro Paint & Finish prides itself on delivering superior commercial drywall services across Indiana, from Goshen to South Bend and beyond. By choosing us, you're choosing a partner who's committed to fulfilling your unique drywall needs efficiently and to your utmost satisfaction. Trust us to uphold the highest craftsmanship and customer service standards, ensuring your commercial property looks its best for years to come. Call now for a free quote! (574) 596-3072

How Painting Your Home Increases Value and Appeal

Is Painting a Good Investment for a Home?

For today’s homeowners, painting a home can be done quickly and at less cost than in past generations. The quality of paint available today and the wide range of colors makes it possible to quickly change the look and feel of your home.

Both interior and exterior paint jobs are fast and require only a small investment. Yet you may wonder if painting your home is a good investment or if you would be better served to invest your money in another home improvement task. The answer is yes. Painting your home is a great investment. Here is a closer look at why.

1. Improved Appeal

Whether you paint the interior or exterior, if you do the job well and use a high-quality brand of paint, you will increase the appeal and attractiveness of your home. The fresh look and brighter colors catch the eye and bring the right type of attention to your space. While this is important if you’re considering selling, it also makes your home more enjoyable when you still live in it.

2. Increased Cleanliness

Fading or stained paint makes your home look dirty, no matter how clean you keep it. If you paint the walls, you will instantly make the home feel cleaner. This home improvement task also allows you to re-evaluate your wall décor to create a more organized look, removing unnecessary clutter. The result is a space that looks clean and put together.

3. Low-Cost Investment

Painting can quickly transform your home, yet it is a very low-cost project. The cost to hire painters and purchase quality paint is much less than the cost of upgrading flooring or countertops, and the effect can greatly impact the look and feel of your home. If you want a home improvement job that gives you a lot of bang for your buck, this is one to consider.

4. Increased Home Value

Homes rise in value when they look appealing on the inside and out; fresh paint helps with this. A fresh, modern color can make the home appear new, increasing the house’s potential resale value. In contrast, old, outdated paint can make potential buyers wonder what other home improvement tasks you left undone, which can detract from the value of your home.

5. Refreshed Style

Finally, giving your home a fresh coat of paint will make it feel updated and refreshed. You can completely transform the home’s overall vibe and embrace modern colors and styles with a new paint job. Often, updating the paint can remove the feeling that you need to tackle more costly improvements.

How Much Value Does Painting a House Add?

Painting a house brings a high return on investment, but just how much?

According to 2012 estimates from HomeGain, painting the interior of a home will boost its value by about $2,000, and it costs just over $960. This is over $1,000 in improved value. On the other hand, on average, exterior house painting costs more at $1,400, increasing the weight by over $2,170.

How Often Should a House Be Painted?

For the home’s exterior, you should plan to paint every 5 to 10 years. For stucco or wood, aim for closer to 5 years. On the interior, repaint every 3 to 5 years.

What Are Some Tips for Maximizing ROI on Painting a House?

If you want to maximize your ROI on painting your house, consider these tips:

  1. Choose neutral colors with a slightly warm hue, but avoid white or bold, bright colors.

  2. Prioritize the living spaces if you must choose one room over another.

  3. Use lighter colors to make small rooms look bigger and deeper colors to make huge rooms look cozier.

  4. Don’t just paint walls – update doors, cabinets, and trim with fresh paint.

  5. Paint the shutters, exterior doors, and the siding when doing your home’s exterior paint job.

  6. Repair holes and cracks before painting.

A fresh coat of paint breathes new life into your home, making it more appealing as you live in it or should you decide to sell. It is a wise investment with a low, upfront cost compared to other home improvement tasks.

Contact the Pro Paint and Finish team today if you want professional help with your home painting project.

Expert Tips for Painting Drywall Like a Pro

How To Paint Drywall

Whether it’s having just finished drywalling a basement for a remodel, replacing some broken drywall in a child’s bedroom, or looking to give an old wall some new life, it’s time to get painting. Painting drywall is a fairly simple process that doesn’t require much time if you prepare in advance.

Here are the basic steps for painting drywall:

1) Prepare the Room

Remove any of the room’s furniture and decor at risk of getting dust or paint on it, then lay some drop cloths down on the floor. Use painter’s tape to protect any trim, molding, or other parts you don’t want to be painted.

2) Repair Imperfections

Drywall—even drywall that was recently put up—can have slight imperfections such as dents, cracks, or nail holes. Take a little joint compound and a putty knife to fill in these imperfections and allow them to dry completely.

Once dry, sand the areas smoothly. Make sure to remove any dust from the surface of your drywall.

3) Clean the Walls

Use a damp cloth or a mixture of mild detergent and water to clean the walls. This will remove any other dust. Painting an older section of the drywall will also help remove cobwebs and other debris that may affect the paint’s adhesion to the surface and a smooth look to the finished wall.

4) Start With Primer

It’s essential to prime the walls first before painting. This will improve paint adhesion and aid in hiding any stains or flaws that might still be visible. Then, ideally, use a primer specifically designed for drywall.

You should only need one primer layer if painting over a light color. However, if you’re painting over a piece of drywall that has already been painted a dark color, you may need to apply two or three coats of primer.

Before adding your final coats, ensure each layer of primer has dried completely, and then give it a light sanding.

Sanding will give more for the paint to adhere to and result in a more long-lasting finish. Don’t forget to clean up any dust that may have accumulated during this sanding.

5) Apply Paint

Apply paint to the walls using a roller or a brush. Working in sections, begin painting at the top of the wall and work your way down. Use a paint edger or a small paintbrush to paint around and in tight corners. Before adding a second layer, let the first coat of paint dry thoroughly.

Apply your second coat the same way you did the first coat, paying special attention to keeping the coverage complete and even.

It’s important not to rush. You don’t want uneven applications to result in splotchy work.

6) Clean Up

A job is only complete once everything has been cleaned up.

Remove the drop cloths and painter’s tape after the paint has dried, and replace any furniture removed from the space.

And enjoy your newly painted drywall.

How Many Paint Layers Should You Use?

Two coats of paint should be the minimum. The number can vary depending on the type of wall and its primary color. For instance, unpainted drywall will have a layer or two of primer, plus your top coats.

If the previous color is darker than the paint you’re using now, you’ll want to add an additional coat (or maybe two) to conceal the deeper color below fully.

Brush or Roller?

Paint rollers allow painters to cover a lot of surface area quickly, but they are not very good for detail work around moldings, corners, and similar features. Also, a roller frequently leaves a thin line of excess paint on the edges.

This is where a paintbrush comes in handy.

You can more easily get into corners and other smaller areas and use the brush to feather away excess paint from the roller edge. You can also use a brush to help smooth any accidental drips.

To Spray Or Not To Spray

Paint can also be applied using an airless paint sprayer. These are best used when you have a very large area to paint, as they are significantly faster than rollers or brushes. The downside is that they aren’t good with tight spaces, corners, and other detail areas.

You could do a large area with a sprayer, get closer to the edges with a roller, and then do all the touch-up and corner work with a brush.

A sprayer may not be essential for most homes, but it’s an excellent option for large-scale painting jobs.

Helpful Tips

  • Use drywall paint that has been specifically formulated for that purpose.

  • To ensure a smooth and even finish, use a paintbrush and roller of superior quality.

  • For more extensive undertakings, consider using a paint sprayer.

  • Avoid packing too much paint onto the roller or brush because this might result in drips and an uneven finish.

  • Give each application plenty of time to dry in between.

By following these steps, you should be able to paint your drywall successfully and achieve a smooth and even finish. Then, you can paint your drywall like a pro with patience and attention to detail.

Sometimes it’s best to have your painting needs addressed by experts. That’s where the knowledgeable team at Pro Paint & Finish comes in.

With more than 15 years of experience, we can manage your interior painting and deliver perfect results. In addition, we offer color-matching services, so your drywall will blend seamlessly with the rest of your house.

Our work is backed by a two-year warranty and has earned us an A+ rating from the Better Business Bureau. For a free consultation, call today. (574) 596-3072

The Ultimate Guide to Drywall Repair and Installation

Everything Homeowners Need To Know About Drywall

Drywall is the preferred surface for walls and ceilings in home building and remodeling because it is readily available in various sizes and types.

In building, large drywall panels are fastened to a house’s inner frame using drywall screws. The corners are beaded, joints taped, and then covered with joint compound, which is then sanded after a short curing period. Once the drywall is up and fully secured, it can be easily painted with just about any type of paint the owner wishes.

Drywall is usually simple to install, versatile, resistant to mold and flame, and perfect for professional construction and DIY remodeling.

Introduction To Drywall

Drywall was developed in the early 20th century as an alternative to plaster walls. Since then, drywall has established itself as the standard wallboard for many construction purposes. Prior to the development of drywall, most walls were constructed using laths of wood covered in plaster. When applied, plaster made from gypsum or lime was moist. In contrast, drywall comes in big, prefabricated sheets, and the wall is “dry” when it is put up, only needing a wet joint compound between sheets to fill in gaps after installation.

Due to its ease of installation and repair, drywall has displaced plaster as the preferred material for wall construction. Many people refer to drywall as “Sheetrock,” but this is a brand name, much as how “Band-Aid” refers to a specific brand of adhesive bandage. Therefore, drywall is the preferred generic term.

What Drywall Is Made Of

Gypsum is the primary material making up drywall. A backing material is covered with a slurry of crushed gypsum, water, and other chemicals and then dried. The gypsum board that results is both fire and mold resistant. Because gypsum is widely available, drywall tends to be reasonably priced.

Paper or fiberglass is frequently used as a drywall backing material. Even though the gypsum component is mold-resistant, paper backing can develop mold when exposed to water. Fiberglass backing material, however, possesses additional resistance to moisture and mold but is still not meant to withstand continued or excess exposure to water. As handy as drywall is, it should be remembered that gypsum is water-soluble and that sustained water damage must be addressed immediately.

Fire-Resistant Varieties of Drywall

The backing material and the gypsum core of drywall can have different treatments that affect their resistance to fire. Type X drywall, for instance, is thicker than typical 1/2-inch drywall and incorporates glass fibers inserted in the gypsum core. Because of this, Type X drywall can withstand significant fire damage for around an hour. With more glass fibers incorporated into the gypsum core, Type C drywall enjoys an even greater fire resistance. Some tests have Type C drywall outlasting Type X drywall in the amount of exposure to fire by at least double.

Maintaining Healthy Drywall

While drywall has its advantages, it doesn’t take much to damage it. That said, patching, repairing, or replacing drywall isn’t all that difficult if you know what to do.

Patching Drywall

When drywall acquires tiny holes, abrasions, scrapes, and indentations, patching is usually the most popular repair option. Some spackle and a smoothing tool are all required for small holes or blemishes.

Even larger holes can be repaired with a patch. You can find all the tools you need in a drywall patch kit from any hardware store. The patch is applied over the hole, followed by a joint compound, and smoothed over until the edges match the wall. After drying, you can repaint the affected region or the entire wall.

Repairing Drywall

Holes six inches or larger are going to need more than a patch. Fortunately, repairing is still within reach of most homeowners.

The process primarily involves replacing the damaged area with a fresh piece of drywall. Simply cut a piece of drywall large enough to cover the damaged area but with just enough space around it to allow it to be placed in the area being fixed. Next, trace the damaged area to help determine the size and shape you need. The new piece of drywall should fit perfectly as a result. You would then affix the new piece with some joint tape and joint compound, followed by a fresh coat of paint.

You might need additional backing support with two wooden furring strips for larger repairs.

Replacing Drywall

Sometimes, it is not practical to repair the drywall if the physical damage is significant and extensive enough.

When moisture builds up on drywall due to plumbing problems or inadequate insulation, the material may begin to degrade over time due to mold and bacteria. Repairing holes from deterioration and painting over mold stains will only mask the more serious issue of faulty plumbing, leaks, or insulation.

At this point, you should prioritize fixing the source of the problem, then removing and hanging new drywall after the problem has been fixed. Professionals often do this best unless you already have experience installing new drywall.

Drywall Repair and Installation Tools

Before engaging in DIY repair or installation, you should know the necessary tools.

The Essentials List

If you expect to be working on the drywall in your home or building, you should have the following items in your toolbox ready to go. Most are available at hardware stores.

  • Carpenter’s pencil

  • Chalk line

  • Drill fasteners

  • Drywall T

  • Mud pan

  • Outlet marker

  • Putty knives (4”, 8” and 12”)

  • Sanding block

  • Tape measure

  • Utility knife

Drywall Mud

Drywall mud is used after hanging drywall to hide joints, smooth out dings, and perform repairs. It’s an essential part of the drywall installation process and is often used in repairs. It usually comes in a powdered form mixed with water or as a premixed paste. Most repairs and DIY installation projects can use an all-purpose drywall mud. Still, more advanced varieties, such as topping and sanding muds, are used for getting specific desired finishing effects.

Drywall Anchors

When you want to hang items on your drywall but don’t want them to pull out and fall, you’ll want to take advantage of drywall anchors. The most common types you’ll see and likely use are plastic sleeve anchors, self-drilling threaded anchors, molly bolts, and toggle bolt anchors. Each work by expanding and biting into your drywall to help ensure the mounted item stays in place.

In most cases, the weight of the object you want to hang will determine the drywall anchor you use. Your choices typically are:

  1. Plastic sleeve anchor: Under 10 lbs

  2. Self-drilling threaded anchors: 10 to 25 lbs

  3. Molly or traditional toggle bolts: 25 to 50 lbs

  4. Toggle bolts: over 50 lbs (or screw drywall into an actual stud)

Some drywall anchors can support up to 100 pounds, but before hanging expensive objects from them, you may want to test them first.

How To Find Drywall Installation Contractors Near Me

Finding a trustworthy and dependable contractor for home renovation work, such as drywall installation or repair, can be challenging. Here are some things to keep in mind when hiring a contractor.

  • Interview three contractors at a minimum.

  • Request references.

  • Know the going rates for labor and supplies.

  • Expect to put down a deposit.

  • Verify insurance and licenses.

  • Make sure proper permits are acquired.

  • Negotiate ground rules before signing a contract.

  • Keep receipts and copies of guarantees or warranties.

  • Wait until the job is finished before making the final payment.

Call Pro Paint & Finish To Handle Your Drywall Installation and Repair

Sometimes it’s preferable to leave repairs to drywall and plaster to professionals. That’s where the knowledgeable team at Pro Paint & Finish comes in.

With more than 15 years of experience, we can manage your interior drywall installation and repairs and deliver perfect results. In addition, we offer color-matching services, so your new drywall will blend seamlessly with the interior of your house.

Our work is backed by a two-year warranty and has earned us an A+ rating from the Better Business Bureau. For a free consultation, call today. (574) 596-3072